Falling Leaves & Mushroom Soup

Hello Dearest Readers,

It’s the coziest season of them all.

How do you stay warm and cozy in the Fall?

While I’m delighted that the seasons are changing, I also anticipate the need for sustained rituals to support good mental health throughout the colder days. One of these is lighting my favorite candle, listening to music, and making soup.

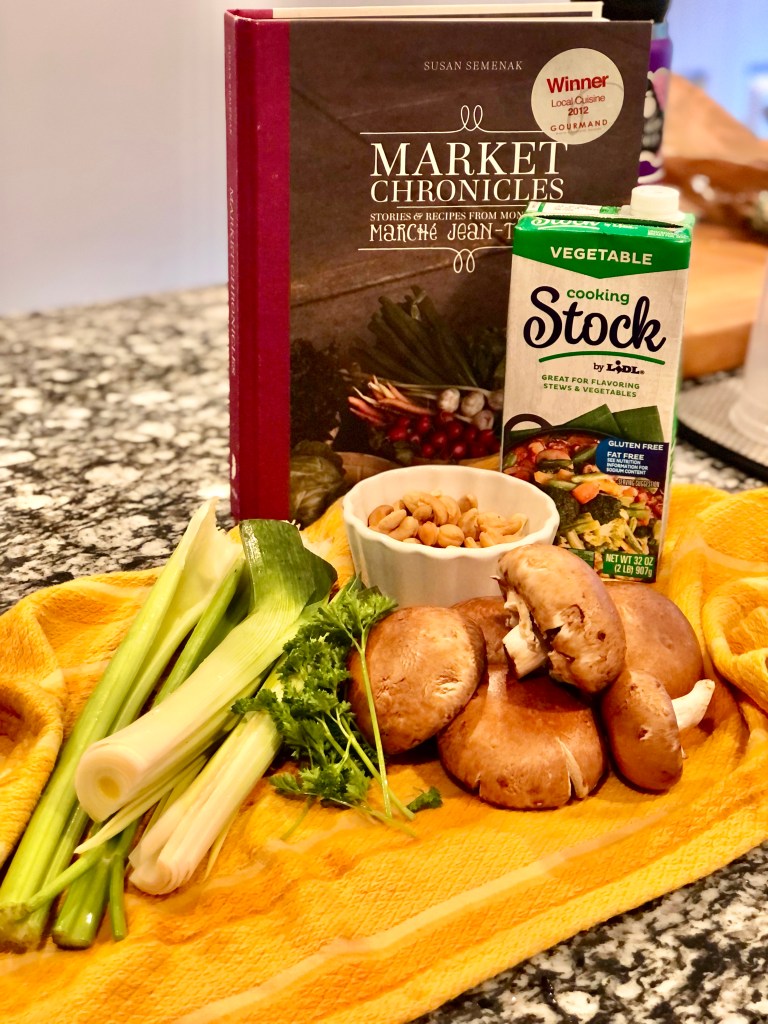
The soup I will be talking about today is the last recipe I’ll review from Susan Semenac’s The Market Chronicles. I chose to make the “Mushroom and Chestnut soup”.

Admittedly, I couldn’t find roasted chestnuts anywhere. So, I chose the next best thing– cashews. They’re often used in vegan recipes to create silky textures in salad dressings and sauces due to their high volume of fat. So I thought, why not give this a whirl. YOLO, as the ancient wisemen say.

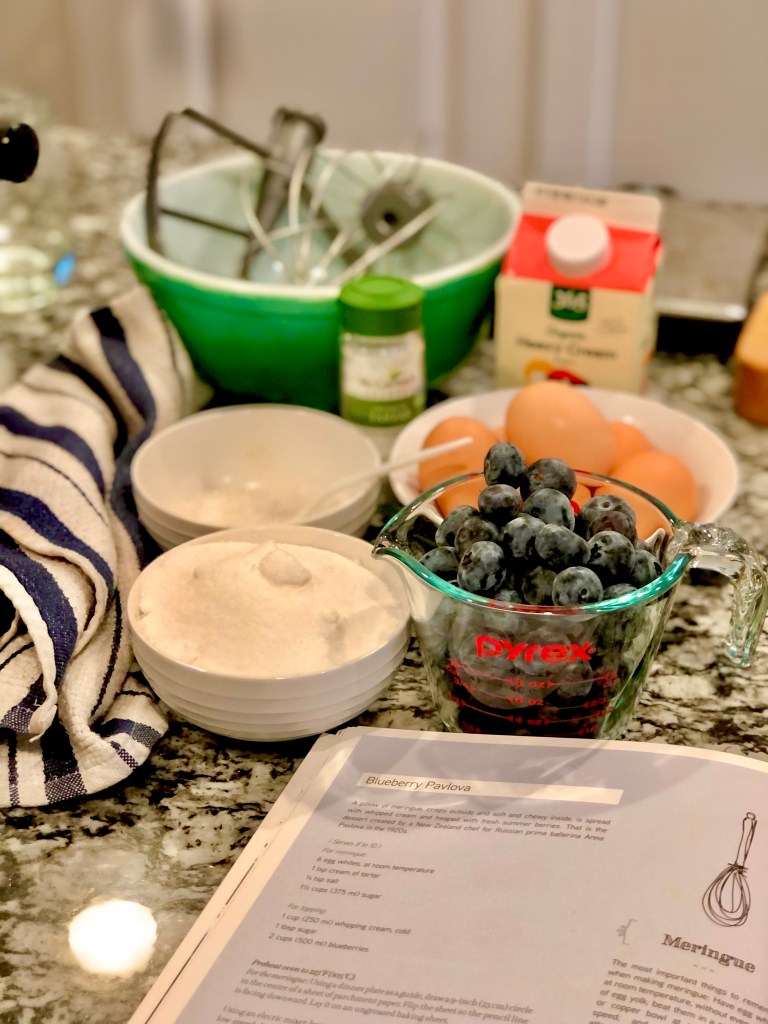
Here are the ingredients I used:

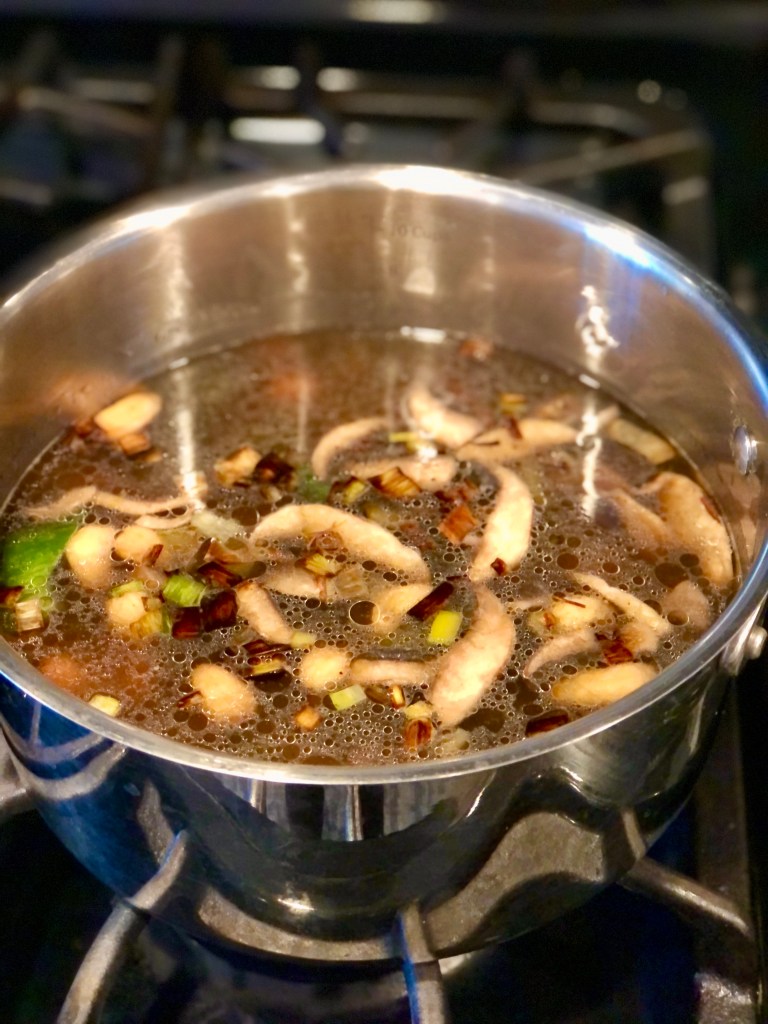
The first step is chopping up all your veggies and setting aside.

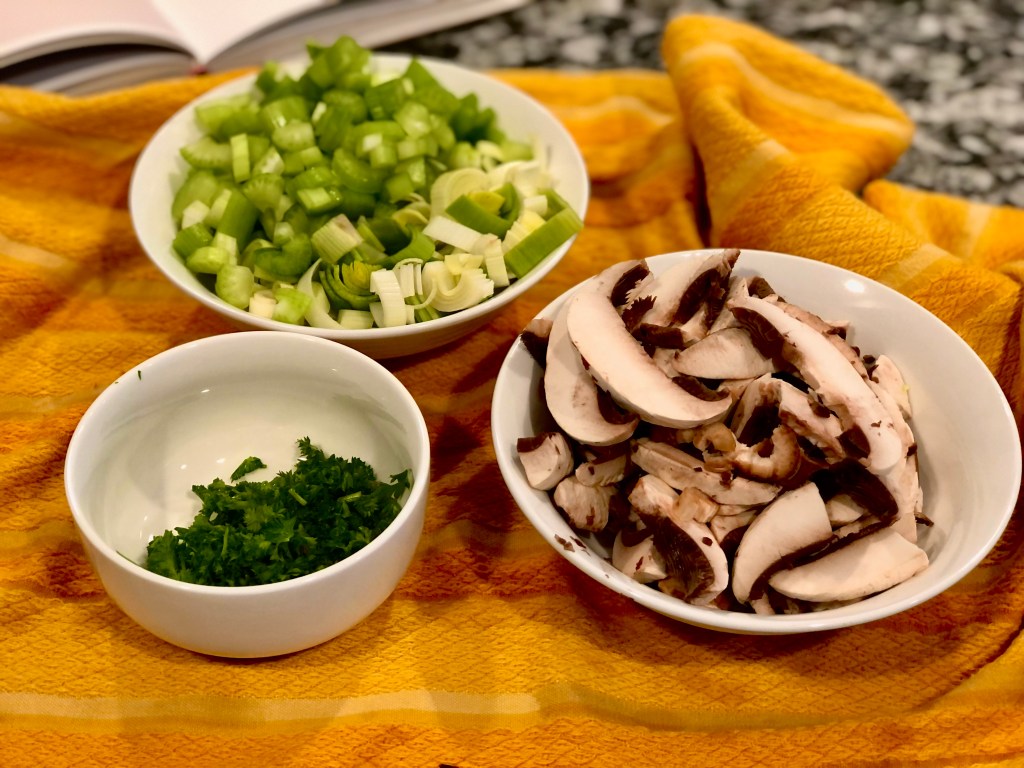
At this point, you will sauté the celery, leek and mushrooms until tender and add a pinch of salt and pepper. I also added some sherry towards the end for flavor depth and let that evaporate.

Once your veggies are tender, add them to whatever stock you prefer (I chose homemade chicken stock) along with the cashews. I know adding nuts to soup sounds unconventional, but trust the process!

Bring to a boil and then simmer for 20 minutes.

Once the 20 minutes are up, go ahead and blend this in small batches. Be mindful that the consistency of the soup will depend on how much stock is added to the blender. If you want a thicker soup, like a velouté, use less stock.

In the end, plate and add toppings. I used leftover sautéed mushrooms, parsley, chives, and added a bit of cream. I think some parmesan cheese would go with this as well. The result is a silky soup that is very rich, filling, and tasty. I recommend blending well, as the nuts require more time to break down and become smooth.

This is the final result:

The one mistake I made was not blending enough. It ended up being a bit … chunky, for lack of better words. Hence, my recommendation earlier to blend, blend, and blend some more. Otherwise, this was delightful. I can see it being the perfect meal for a cold evening. It’s adequate especially if you are lactose intolerant or vegetarian/vegan.

Well, my friends, I hope you enjoyed this post. I wish you a happy and joyful weekend & week ahead.

Evy

A Little Slice of Cherry Cobbler

Hello dearest readers,

I hope you’ve been doing well. This past year has been so fun and busy for us as Alex and I got married! It’s been an absolute whirlwind of happiness, change, emotions running high, travel for the first time in 2+ years and much more.

But I’m back! I chose to re-open the blog with a classic: the cherry cobbler. This might surprise some of you, but this is my first time making it… and eating it, now that I think about it. And as a true completionist, I picked up where I left off last year by reviewing Susan Semenac’s Market Chronicles. The recipe seemed very simple and fast, which was perfect for the amount of effort I was willing to spend.

These are the ingredients:

The quality of cherries you use is completely up to you. The recipe called for fresh sour cherries, which apparently are hard to find. I chose to go with frozen sweet cherries instead. I wasn’t kidding about low amounts of effort :D. But if I’m being entirely truthful, part of me wanted to see what would happen if I opted for convenience over freshness. I’m sure there’s a difference, but *spoiler*, convenience doesn’t taste bad at all.

The first step is always TURNING ON YOUR OVEN before you start. You want your oven at temp by the time everything is ready to be baked. I learned that the hard way time and time again. Next, toss the cherries in cornstarch and sugar. If you use sweet cherries, remember to minimize sugar!

Let those sit for a little bit.

Then, create your batter by mixing butter and sugar, adding an egg, buttermilk, flour, and baking powder and set aside. Toss the cherries into a greased 10″ cast iron pan (or 13″x 9″ baking dish) and add batter on top in sloppy spoonfuls. You want some fruit peeping out.

I later learned there are different ways to top a cherry cobbler. The method I used created a more “doughy”, less sweet experience. Others might prefer a sweeter, crunchier topping like a crumble pie. I let it bake for approximately 45 minutes, until the top turned golden and the fruit was bubbling. For additional garnish and flavor, ice cream is recommended.

Overall, I thought it was pretty good. The reviews from others were positive and there were some who went in for seconds. I was very flattered- I brought this for a family cookout, so the stakes were high! From what I can tell, the recipe itself is accurate: the ingredients and measurements work well, as do the instructions. I give this a 5 out of 5!

Anyways friends, I hope you enjoy the rest of your week. Till next time!

Lots of love,

Evy

A Little Twist: Blue Chips

Hello friends,

The holidays are upon us, and what better way to start a dinner party with some colorful, delicious snacks.

Blue (or maybe purple?) potatoes are a colorful twist on fried potato chips, and can be seasoned with pretty much anything you prefer. I followed recommendations of the recipe itself, which is one of the Fall recipes of Susan Semenak’s “Market Chronicles”.

(Link for the book is below)

This is what blue potatoes look like:

Pretty neat, huh?

I sliced them with a mandolin and let soak for about half an hour to eliminate extra starch. Once the frying oil reached 375 degrees, I slowly added the slices in small batches and waited until they turned a light, crispy brown.

Once placed on a napkin to drain excess oil, and while hot, I added a pinch of salt, black pepper and rosemary.

There you go! Blue chips. It’s an easy way to make a snack that many can enjoy.

Speaking of easy, delicious snacks: have you ever tried fried tortilla chips?

Or even better… fried habanero infused tortilla chips?!

Because you should.

These are the ingredients.

In all seriousness, regular flour tortilla chips are equally delicious. It’s our go-to for a quick dinner starter, especially if we have leftover tortillas that we don’t know what to do with.

Whatever the type of tortilla you choose, cut them into slices and fry them in a deep pan, at 375 degrees.

I flavored them with a pinch of salt, Old Bay, and some sage. They were served with buffalo chicken dip, and boy, were they excellent! Crispy and a touch of spicy.

Well, friends, I hope you have a great week ahead! I hope you can try this at one point and enjoy as much as we did.

Much love,

Evy

Link to Susan Semenak’s Market Chronicles: Stories and Recipes from Montreal’s Marché Jean-Talon

https://www.editions-cardinal.ca/livres/cuisine/market-chronicles-stories-and-recipes-from-montreals-marche-jean-talon-15042

Light, Fluffy, and Brittle: The Blueberry Pavlova

Hello, dear readers.

This week, I tackled something sweet and delicious– the blueberry pavlova.
I’ve never eaten pavlova before and had no idea what it would taste like or feel like in terms of consistency. In all the photos I had seen, it looked like a cloud of delicious mystery.

For those who didn’t know (like myself), the pavlova is a dish that was first spotted in Australia and New Zealand in the early 1920’s. The “pavlova” is likely named after Russian ballerina Anna Pavlova, who was touring in the country at that time. It is a light dessert that has a brittle crust, and is usually topped with whipped cream and fruit.
The one we will be making today will be topped with blueberries.

The ingredients needed are below:

Now, pavlova is basically baked meringue.
In turn, meringue is whipped egg whites, with sugar and cream of tartar, until you get “stiff peaks”. I remember seeing meringue everywhere, from cooking shows to fancy pastry shops, and thinking “that must be a headache of a recipe.”
I have since changed my mind.

Meringue is actually very easy to make. The key? Room Temperature Eggs. And I mean it, people. Take your eggs out at half an hour before starting the process. If your eggs are fresh out of fridge, you will fail. (If you’re unsure of what “Room Temperature” actually is– it is between 65-75 degrees Fahrenheit.)

I learned this the hard way.
It was early evening; Alex was beginning to prepare dinner and I was feeling quite impatient, even though Susan Semenac, the author of the recipe, clearly outlined the singular requirement.

What ended up happening?
I dumped the egg whites into the food processor, put it on medium low speed, and waited.
And waited.
And waited.
And then nothing– it was just liquid egg whites. How could this be?!
I finally surrendered and let the egg whites reach room temperature.

Guess what: it worked!
Another change I made (which Alex recommended) was to increase the speed. Medium-low will not get you there.

I got very excited when I achieved the famous “stiff peaks”:

Once you get this result (and after you do your victory dance), shape the beautiful meringue into a circular mound on a baking sheet. Make sure to dig a little pocket in the middle, like so:

You then will bake it at a low temperature, around 225 degrees Fahrenheit, for 1 hour or until you see a light crispiness and browning.

Once out of the oven, it will look like this:

Once cooled, you can add the whipped cream and fruits!

I say this without trace of exaggeration: this dessert is exceedingly sweet and amazing.
Can you recall the taste and consistency of cotton candy? How you feel the crisp, sweet sugar melt on your tongue? Combine this subtle crisp with a fluffy internal texture equal to marshmallow fluff, and whapow! You have pavlova.
The whipped cream and fresh fruit adds layers of flavor to the otherwise tasteless crunch.

What makes this ideal for summer is the weightless, cloud-like sweetness which can be paired with fruits of the season– peaches, blueberries, strawberries… the possibilities are endless!

I think the recipe itself is, for the most part, accurate.
The one criticism I have is in regards to the times allocated for the baking: while recipe says 45 minutes, the meringue was still very soft and rubbery at that point. I would replace it with at least 1 hour as mentioned above.

I hope you enjoyed this post and can learn from my mistakes!
Have a wonderful rest of your weekend, friends, and much love.

It’s September: Cheers, with Sgroppino!

Hello, dearest readers.

I hope this week has been good to you so far.
Summer is coming to a close, and as promised, I will hop right into reviewing the Summer chapter of Susan Semenak’s Market Chronicles: Stories & Recipes from Montréal’s Marché Jean-Talon.

Some of the featured ingredients of the season are strawberries, tomatoes, citrus fruits, lobster, cherries, corn, and more. The recipe we will be making today is Sgroppino.

Sgroppino is an after-dinner drink. It is a cool, frothy shot of lemon sorbet whipped with Prosecco and Vodka (and sometimes egg whites to add volume). It is then topped with either a ribbon of lemon peel or mint for garnish.

The ingredients are below:

I made an alcohol-free version of this by substituting alcohol with flavored carbonated water. However, for the purposes of accuracy, the ingredients called for are lemon sorbet, Prosecco (or any sparkling white wine), vodka, and lemons.

That being said, who has lemon sorbet hanging out in their freezer? Not me.
Thank God we have the Internet.

I navigated to my one of my favorite no-nonsense recipe websites (Allrecipes.com) for assistance, and voilà: Lemon Sorbet.

https://www.allrecipes.com/recipe/77853/lemon-sorbet/

In essence, lemon syrup is mixed with carbonated water and lemon juice. The mixture is put in the freezer, where it is whipped every hour for about 4/5 hours.

This is what the mixture looked like after two hours:

This is what it looked like after 3 hours:

And this is what it looked like overnight:

It grew by a full cup! That’s why they recommend putting the mixture in a tall canister.

Once my sorbet was ready, I whipped it with some citrus-flavored Perrier carbonated water and topped it with a mint leaf. The final results were not disappointing: it was tart, refreshing, sweet, bubbly and light– with alcohol, I imagine it is even more divine.

The recipe itself is not original as Sgroppino is a popular Venetian drink, and I wish the author had included a sorbet recipe for the reader’s convenience as well. That being said, the amounts and ingredients are accurate, and the recipe is a great addition to the Summer chapter!

Have a wonderful rest of your week, friends, and may the Sgroppino lighten the remaining days of your Summer.

Lots of love,
Evy.